Contents
1. How to Record Teams Meeting using Vmaker
2. How to Record Teams Meeting using Teams' Built-in recorder
Learn How to Record Teams Meeting in 2 Different Ways
The global workforce underwent a rapid change in 2020 and all organizations ended up choosing a relatively uncommon working model called the 'Remote working model'. This boosted the growth of several video conferencing SaaS platforms like Zoom, Microsoft Teams, Webex, and GoToMeeting.
Looking at the massive growth of these companies, leading tech giants like Google, Facebook and Cisco launched their own business communication tools during the first half of the pandemic.
Although each of these communication tools have its own set of advantages and disadvantages, a lot of businesses prefer Microsoft Teams as it helps them integrate with other Microsoft applications such as MS Word, MS Powerpoint and Microsoft 365.
Also, for businesses that have an ongoing Microsoft 365 subscription, Microsoft Teams can easily be incorporated as a free add on. This helps businesses cut down extra cash spent on additional video conferencing software.
If you're planning to use Microsoft Teams for your business, learning how to record Teams meetings will be hugely beneficial. By recording meetings, you can turn your real-time conversations into valuable informational resources that could be revisited any number of times. It also makes it easier to share the recordings with participants who missed them.
In today’s post, we'll quickly take you through two effective ways to record Teams meetings easily.
How to Record a Teams Meeting
You can record Teams meetings using any of these two options. Choose anyone that suits your requirements.
- Record Meetings in Teams using teams' built-in recorder
- Record Meetings in Teams using Vmaker
But, it's worth noting that the first option comes with a set of limitations. You need to be the host and require specific licenses and approvals. Here's a list of the licences and approvals you need to record a Teams meeting successfully.
- You need to have one of these licenses: Office 365 Enterprise E1, A1, E3, E5, A3, A5, M365 Business, Business Essentials or Business Premium
- You need your IT admin's access
- You need to be the organizer of the meeting to gain access to record the meetings
If you're someone who's a guest or someone who doesn't have the necessary licenses or approvals, you can get your job done easily with the help of a screen recorder as explained below.
Disclaimer: Before we get into the details of how to record Teams meetings, it's important to note that it isn't ethical to record meetings without the consent of all participants. In fact, in certain countries like California, it's considered illegal to record a person without their permission. So, we highly recommend you inform all the participants before you start recording the meeting.

1. How to Record Teams Meeting using Vmaker
When you choose this method, you don't require any Microsoft licenses and don't have to worry about getting your IT admin's consent. Once you install a screen recording software like Vmaker, you can create, record, edit and share any number of videos easily in simple steps.
Let's quickly see how you can get it done.
Step 1: Sign up and install Vmaker
It's totally free to register for Vmaker. So, head over to Vmaker's home page and create an account. Once you've created an account, you have two options.
- If you're a Mac user, you can install the software on your Mac. If you're a Windows user, you can install Vmaker's Windows App.
- If you use a chrome browser, you can install the software as a chrome extension from the Chrome Web Store.
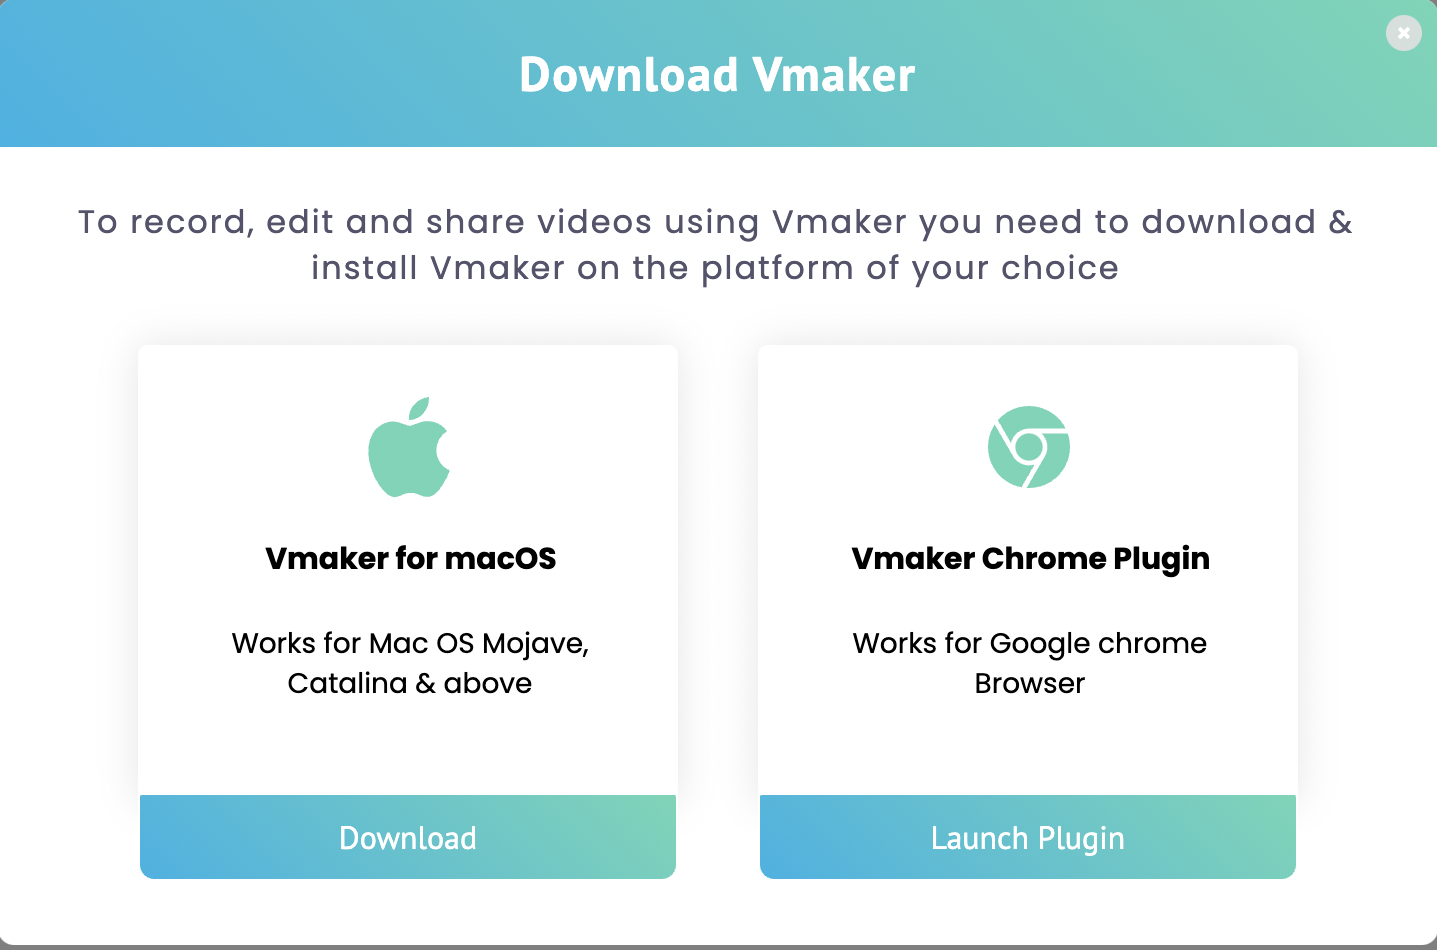
You can choose to use any of the above options that suit your requirements.
Note: In this example, we'll be seeing how to record Teams meetings by using Vmaker's chrome extension.
Step 2: Pin the extension to your browser
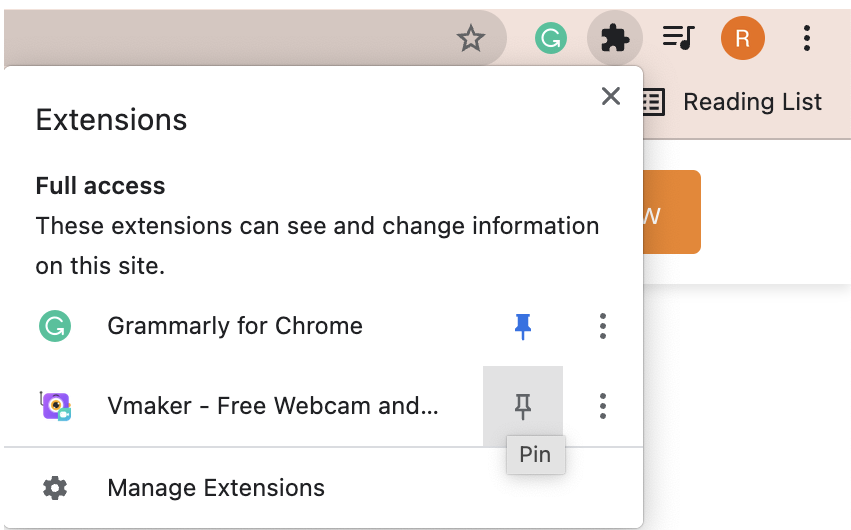
If you're using a Chrome Extension, remember to pin the extension to your chrome browser. This way, you will be able to access the extension whenever you feel the need to record anything.
Step 3: Choose your recording mode and customize your preferences
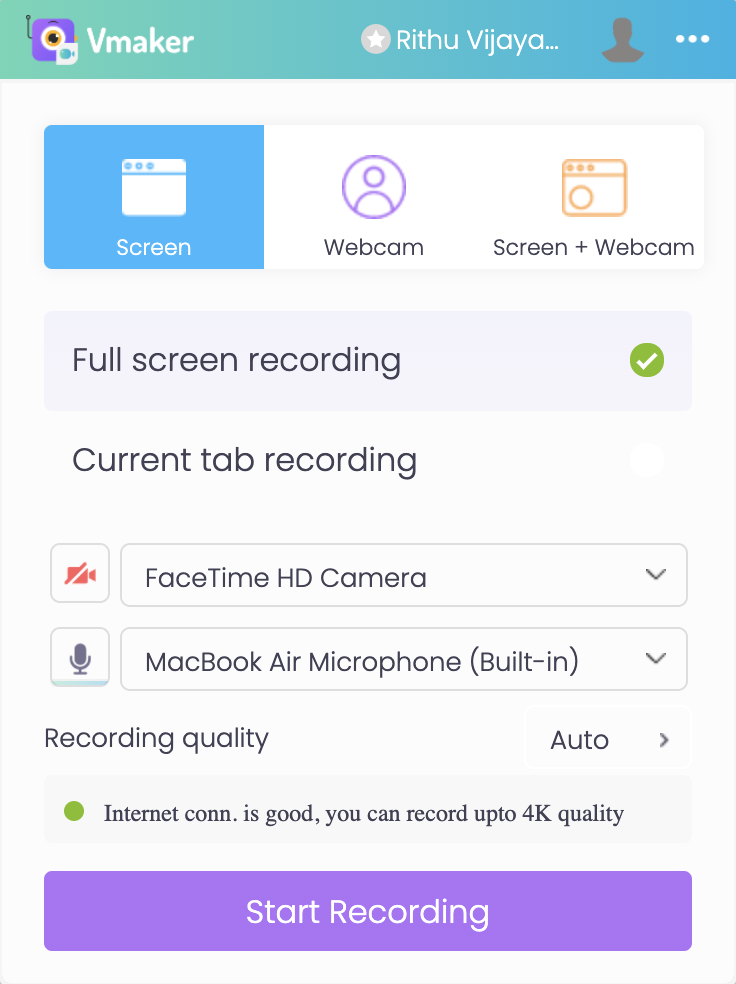
If you'd like to do a test recording before the actual recording, you can do so by just clicking on the chrome extension.
Once you click on the chrome extension, you will have a small dropbox that prompts you to select the basic recording options like recording mode, recording quality, etc. Customize it based on your requirements.
You can also go a step further and customize your recording with more advanced features. Click on the horizontal dot matrix and choose 'Preferences'.
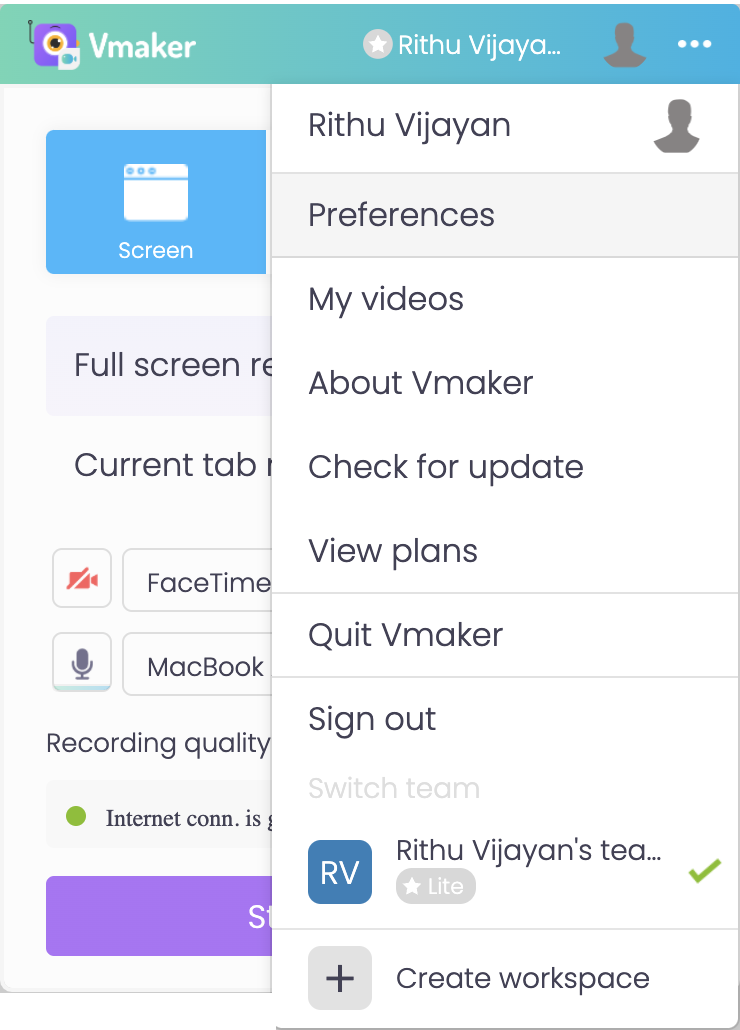
Turn on the internal tab audio to allow Vmaker to capture both the internal and external audio for your recording. Also, feel free to enable other features that would enhance your recording.
Step 4: Join your meeting and start recording
Once you've customized your preferences according to your requirements, you can join your meeting and start recording by just clicking on Vmaker's chrome extension. Now, you'd be directed to a pop-up box. Click on 'Start Recording'.
Select the screen, tab, or window you'd like to share and click on 'Share'. A timer starts, and in three seconds, your recording officially starts.
Whenever you feel the need to stop the recording, click on 'Stop Sharing'. Your recording will automatically get exported to Vmaker's dashboard.
Step 5: Edit and share your recording
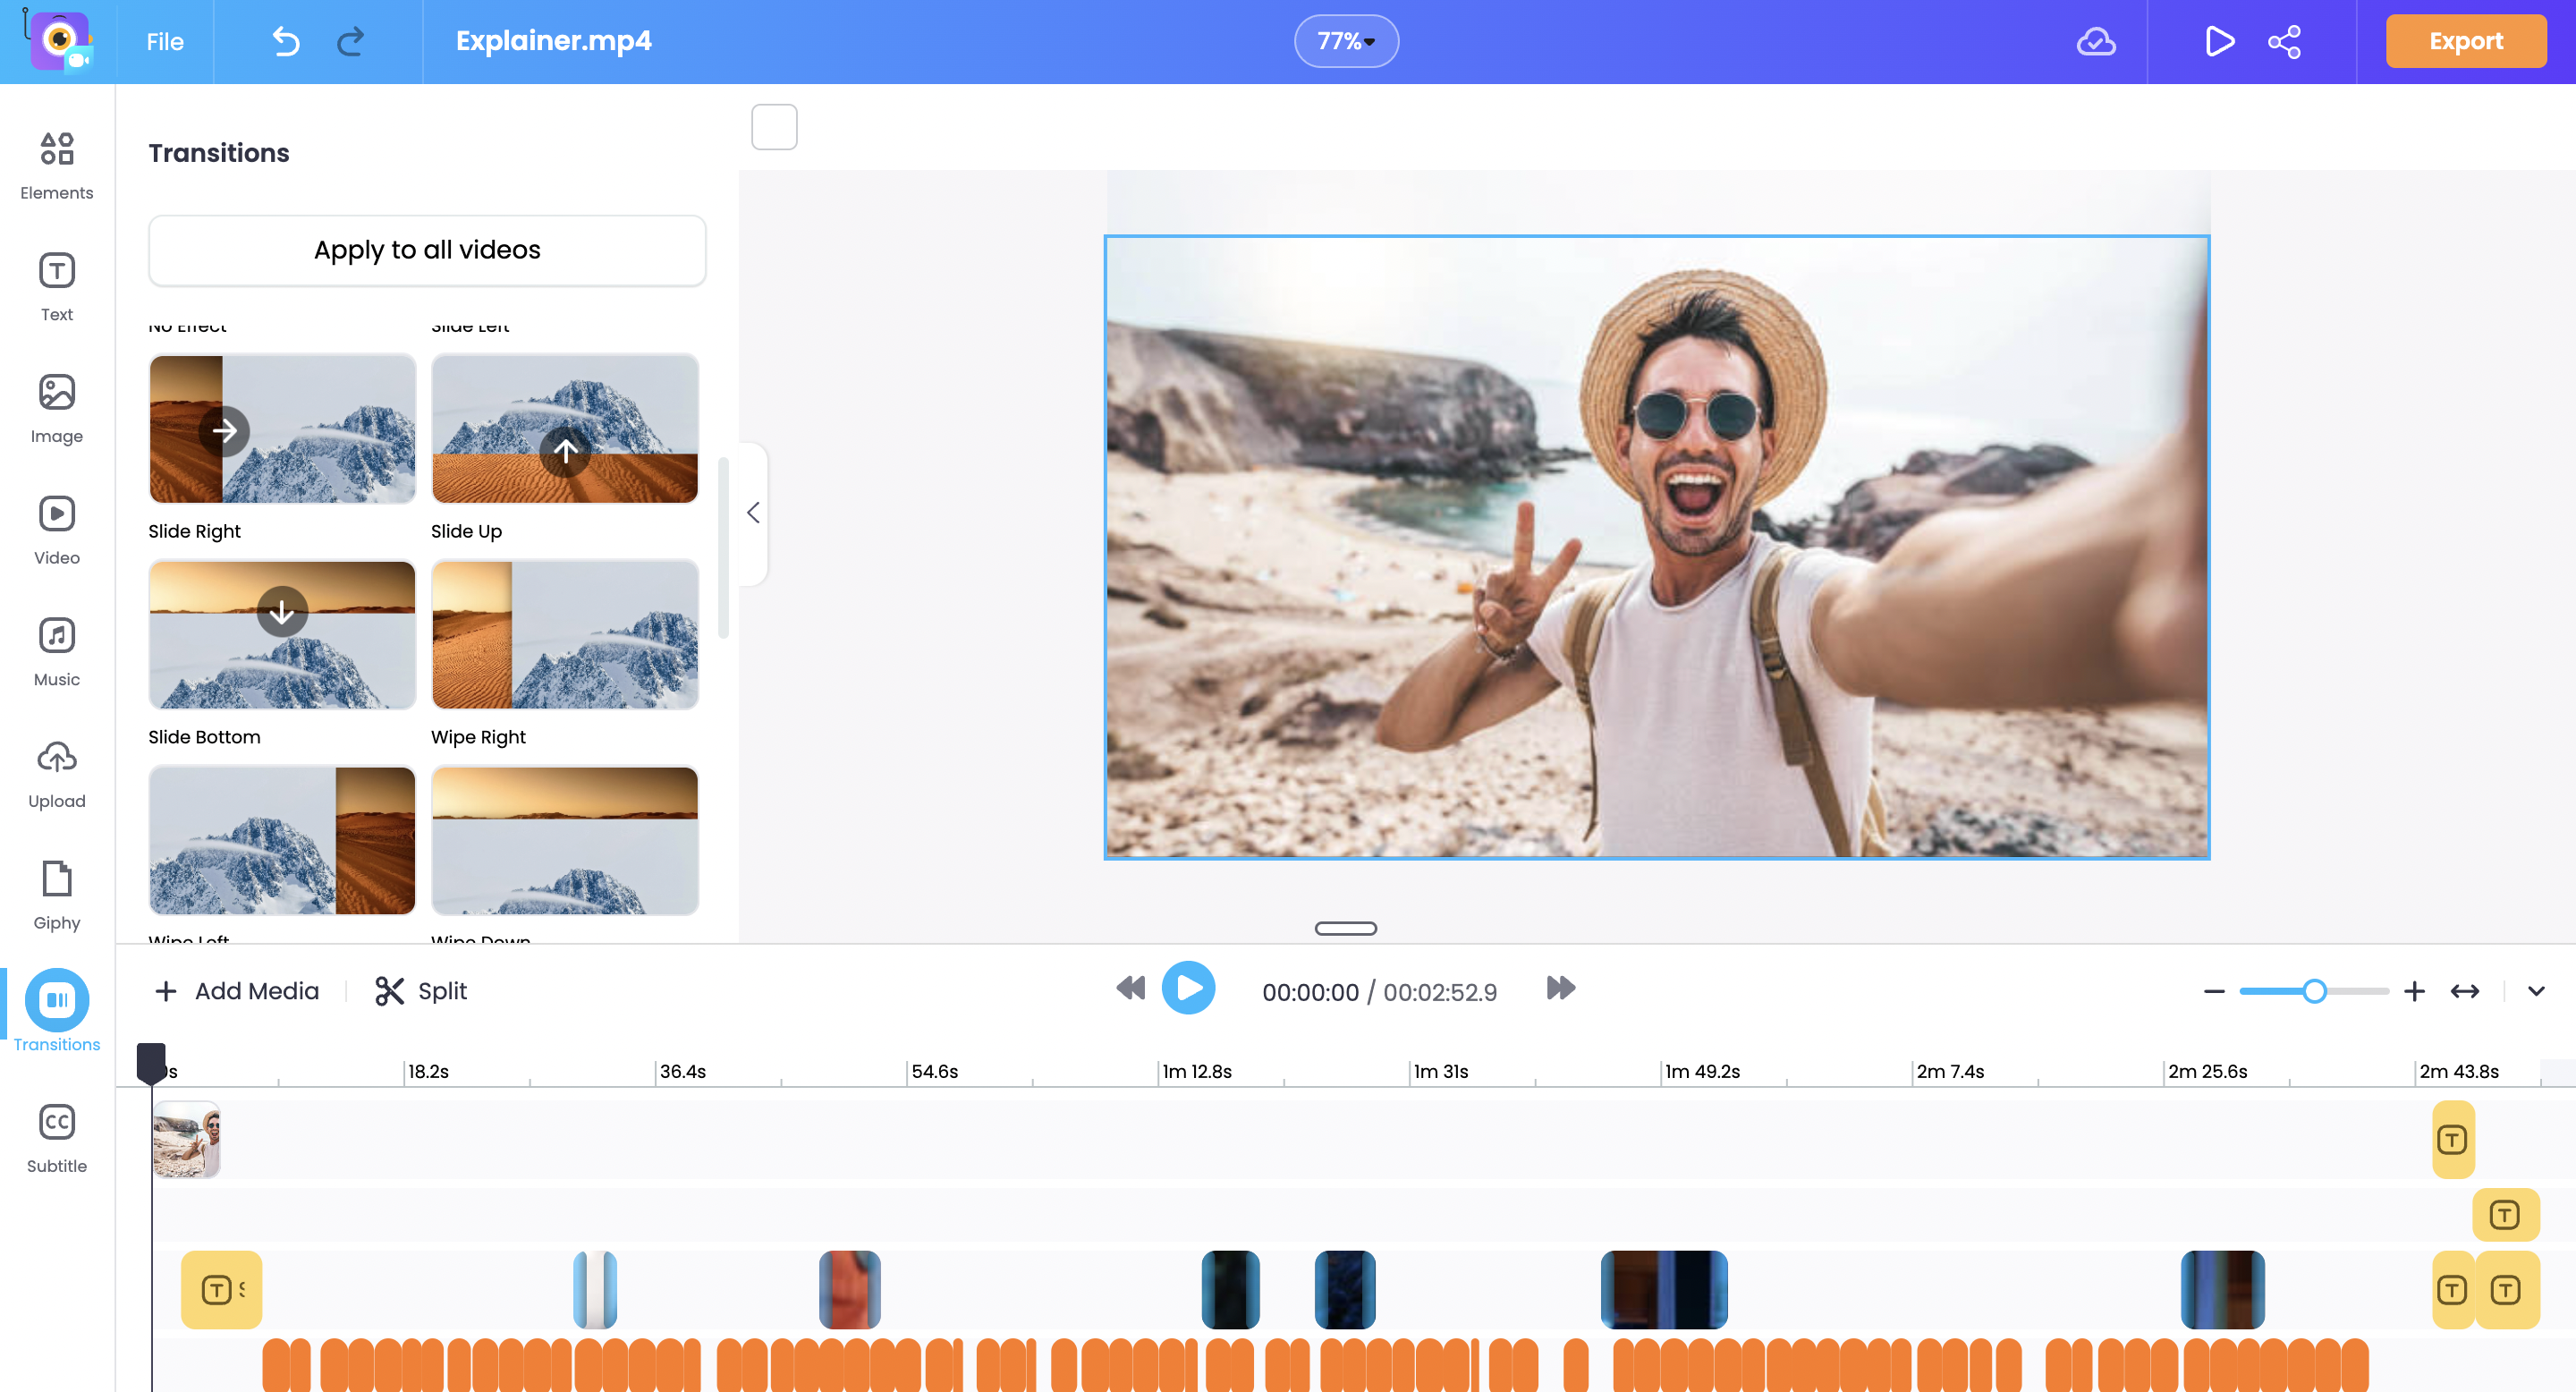
If you'd like to edit the recording, you can do so by clicking on the 'Edit' option. You'd be directed to Vmaker AI video editor. If you don't feel the need to edit your recording, you can simply skip the option.
You can now share, download or upload your recordings to various social media platforms such as YouTube, Facebook, etc.

2. How to Record Teams Meeting using Teams' Built-in recorder
Start recording Teams meetings by simply following these four steps.
Step 1: Join your Microsoft Teams meeting.
Step 2: Click on the triple horizontal dot matrix and select 'Start Recording'. As soon as you click on the 'Start Recording' option, everyone in the team will be notified.
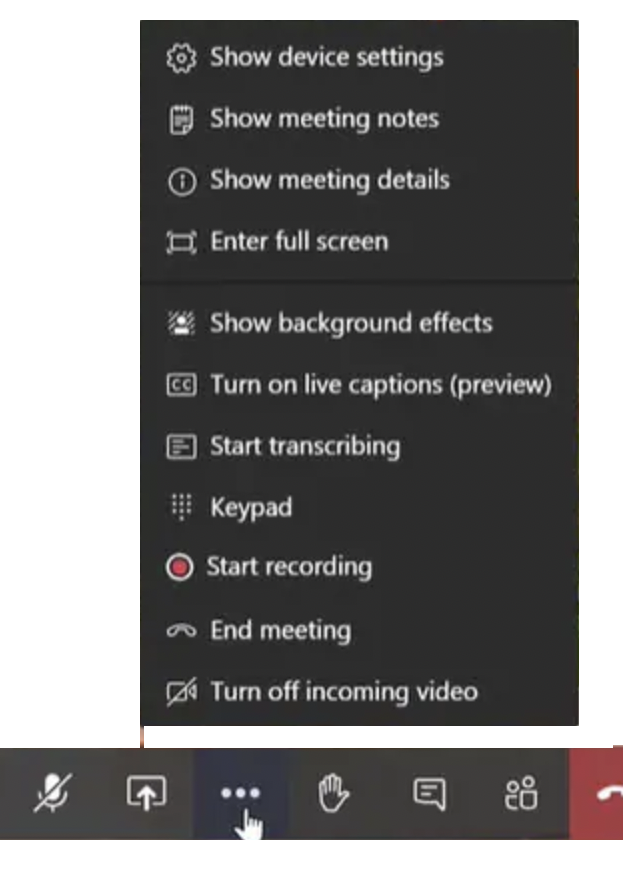
Step 3: When you are done recording, click on 'Stop Recording' to stop the recording.
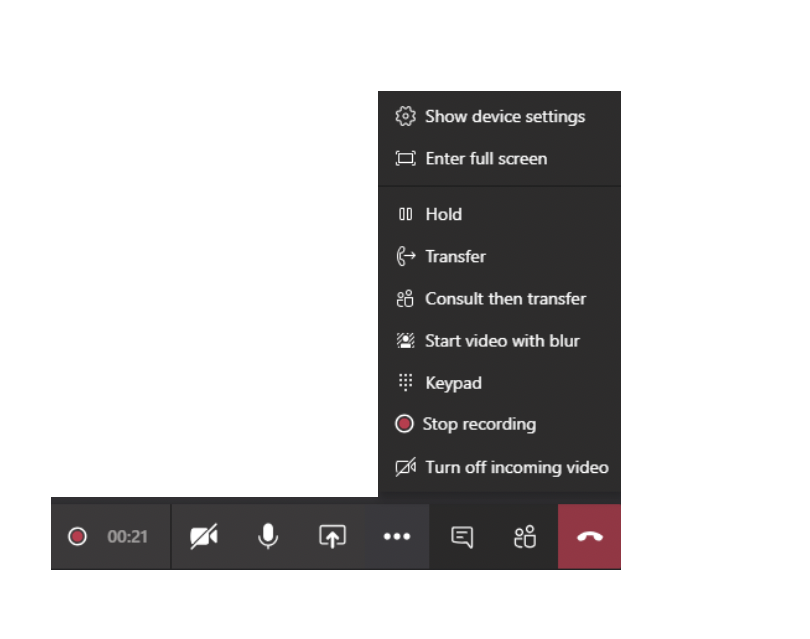
Step 4: Access the files from Microsoft Onedrive & Microsoft SharePoint Online. When a meeting is recorded, it automatically gets uploaded to SharePoint Online or OneDrive.
Frequently Asked Questions
1. How to record Teams meetings externally?
In order to share your Microsoft Teams recordings with people from other organizations, you should make sure you enable the 'Anyone with the link can view' option while sharing.
2. Who can record a Teams meeting?
Here is a list of people who can record a Microsoft Teams meeting.
- Meeting organizers
- Participants who have access from the IT admin
- Participants who have any of the following licenses: Microsoft Office 365 Enterprise E1, E3, E5, A1, A3, A5, F3, Business Essentials or Business Premium
3. How to record Teams meetings on mobile?
Microsoft Teams also has a mobile application. You can follow these simple steps to start recording.
- Step 1: Click on the three horizontal dot-matrix icon.
- Step 2: Select the 'Start Recording' option
- Step 3: Click on 'Stop Recording' when you're done.
4. How to record meetings in Teams using Vmaker's Mac application?
The process of recording a Teams meeting using Vmaker's Mac application is quite similar to the process explained above. Just follow these four steps.
Step 1: Sign up for Vmaker and download the Mac application.
Step 2: Open the application and head over to Vmaker's dashboard
Step 3: Customize your preferences
Step 4: Start recording
Step 5: Edit, share, and upload to social media platforms easily.
Recommended Reads
- Top 10 Screen Recorders to Record Microsoft Teams Meetings
- Top 10 Screen Recorders to Record Skype Calls - Windows & Mac
- Top 10 Screen Recorders to Record Google Meet
- How to Record Facebook Live Stream Videos


